小龙虾 Mac M芯片部署指南
从 0 到 1 的 Mac 部署流程,覆盖 Homebrew、基础环境、OpenClaw 安装与初次配置。
从 0 到 1 的 Mac 部署流程,覆盖 Homebrew、基础环境、OpenClaw 安装与初次配置。
Homebrew 是 macOS 最常用的包管理器。
安装命令都是在 Mac 终端 App 中进行
/bin/bash -c \"$(curl -fsSL https://raw.githubusercontent.com/Homebrew/install/HEAD/install.sh)\"hash -r
brew -v安装成功会显示类似:Homebrew 5.x.x 的版本号。
brew install node git pythonhash -r
python3 --version
node -v
npm -v
git --version应看到类似:Python 3.x / Node 20+ / npm 10+ / Git 2.x。
echo 'eval \"$(/opt/homebrew/bin/brew shellenv)\"' >> ~/.zprofile
eval \"$(/opt/homebrew/bin/brew shellenv)\"hash -r
which python3
which node
which git示例输出:/opt/homebrew/bin/python3 等。
curl -fsSL https://openclaw.ai/install.sh | bash 出现这个界面,安装过程就算完成,后面就是配置过程。
下面保留英文提示并补充中文说明,新手照着选就能完成。
I understand this is personal-by-default and shared/multi-user use requires lock-down. Continue?
  ● Yes / ○ No

我理解 OpenClaw 默认是个人使用,如果多用户使用需要额外安全配置。是否继续?
  ● Yes / ○ No

选择:Yes◆ Onboarding mode
● QuickStart (Configure details later via openclaw configure.)
○ Manual
◆ 你希望用哪种方式配置 OpenClaw?
● 快速开始 (稍后通过 openclaw configure 进行详细设置)
○ 手动配置
选择:QuickStart◆ Model/auth provider
● OpenAI (Codex OAuth + API key)
○ Anthropic
○ Ollama
○ MiniMax
○ Z.AI
○ Moonshot AI (Kimi K2.5)
○ Google
○ Copilot
○ Skip for now
◆ 选择 AI 模型提供商
● OpenAI (Codex OAuth + API key)
○ Anthropic
○ Ollama
○ MiniMax
○ Z.AI
○ Moonshot AI (Kimi K2.5)
○ Google
○ Copilot
○ Skip for now
根据自己的 API 选择,我这里以 Z.AI(智谱)为例。
智谱 API 可在 https://bigmodel.cn/usercenter/settings/account 申请。
◆  Z.AI auth method
  ● Coding-Plan-Global (GLM Coding Plan Global (api.z.ai))
  ○ Coding-Plan-CN
  ○ Global
  ○ CN
  ○ Back

我使用:CN,根据自己实际情况来

===========================================

◆  How do you want to provide this API key?
  ● Paste API key now (Stores the key directly in OpenClaw config)
  ○ Use external secret provider

◆  你希望用什么方式提供这个 API Key?
  ● 现在直接粘贴 API Key
  ○ 使用外部密钥管理器

选择:Paste API key now,在这里粘贴你的 API Key◇ Model configured
Default model set to zai/glm-5
◇ 模型配置完成
默认模型设置为智谱/glm-5
◆ Default model
● Keep current (zai/glm-5)
○ Enter model manually
○ zai/glm-4.6
○ zai/glm-4.6v
○ zai/glm-5
我这里选择:zai/glm-4.6,根据自己实际情况来,按 Enter 继续。Select channel (QuickStart)
● Telegram (Bot API) (recommended · newcomer-friendly)
○ WhatsApp (QR link)
○ Discord (Bot API)
○ Slack (Socket Mode)
○ Skip for now
选择聊天频道,我这里选 WhatsApp(QR link)为例。◇ WhatsApp linking
Scan the QR with WhatsApp on your phone.
◆ Link WhatsApp now (QR)?
● Yes / ○ No
选择 Yes,等待二维码出现,用手机 WhatsApp 扫描并关联新设备。◇ WhatsApp DM access
- pairing (default): unknown senders get a pairing code; owner approves
- allowlist: unknown senders are blocked
- open: public inbound DMs
- disabled: ignore WhatsApp DMs
Current: dmPolicy=pairing
◇ WhatsApp 私聊权限设置
- 配对(默认):未知用户发消息会收到配对码,需要你批准
- 允许列表:未知发件人被阻止
- 开放:公开接收私信
- 禁用:忽略 WhatsApp 私信
当前:dmPolicy=配对
===========================================
◆ WhatsApp phone setup
● This is my personal phone number
○ Separate phone just for OpenClaw
◆ WhatsApp 手机号设置
● 这是我的个人电话号码
○ 仅用于 OpenClaw 的独立电话
选择:This is my personal phone numberWhatsApp number
◆ We need the sender/owner number so OpenClaw can allowlist you.
◆ Your personal WhatsApp number (the phone you will message from)
+15555550
WhatsApp 的手机号
◆ 我们需要发送者/所有者号码,以便 OpenClaw 可以允许您。
◆ 您的个人 WhatsApp 号码(您将发送消息的手机号码)
+15555550
输入你的 WhatsApp 号码,这样 OpenClaw 才能把你加入白名单。Search provider
● Brave Search
○ Gemini (Google Search)
○ Grok (xAI)
○ Kimi (Moonshot)
○ Perplexity Search
○ Skip for now
网络搜索功能可以让 AI 上网查资料(新闻、技术文档、GitHub 等)。
可以在相应的网站申请 API Key,如果没有可以先跳过。◇ Skills status
Eligible: 3
Missing requirements: 48
◆ Configure skills now? (recommended)
● Yes / ○ No
选择 No
第一次安装 OpenClaw,技能很多需要额外配置,可以先选择 NO 或 Skip for now。后续会安装 Gateway 服务并输出 Web UI 地址。
◆ How do you want to hatch your bot?
● Hatch in TUI (recommended)
○ Open the Web UI
○ Do this later
◆ 你希望用哪种方式启动(孵化)你的机器人?
● 终端界面(直接在终端启动 Agent)
○ 打开 Web 控制台(通过网页浏览)
○ 暂时不启动机器人
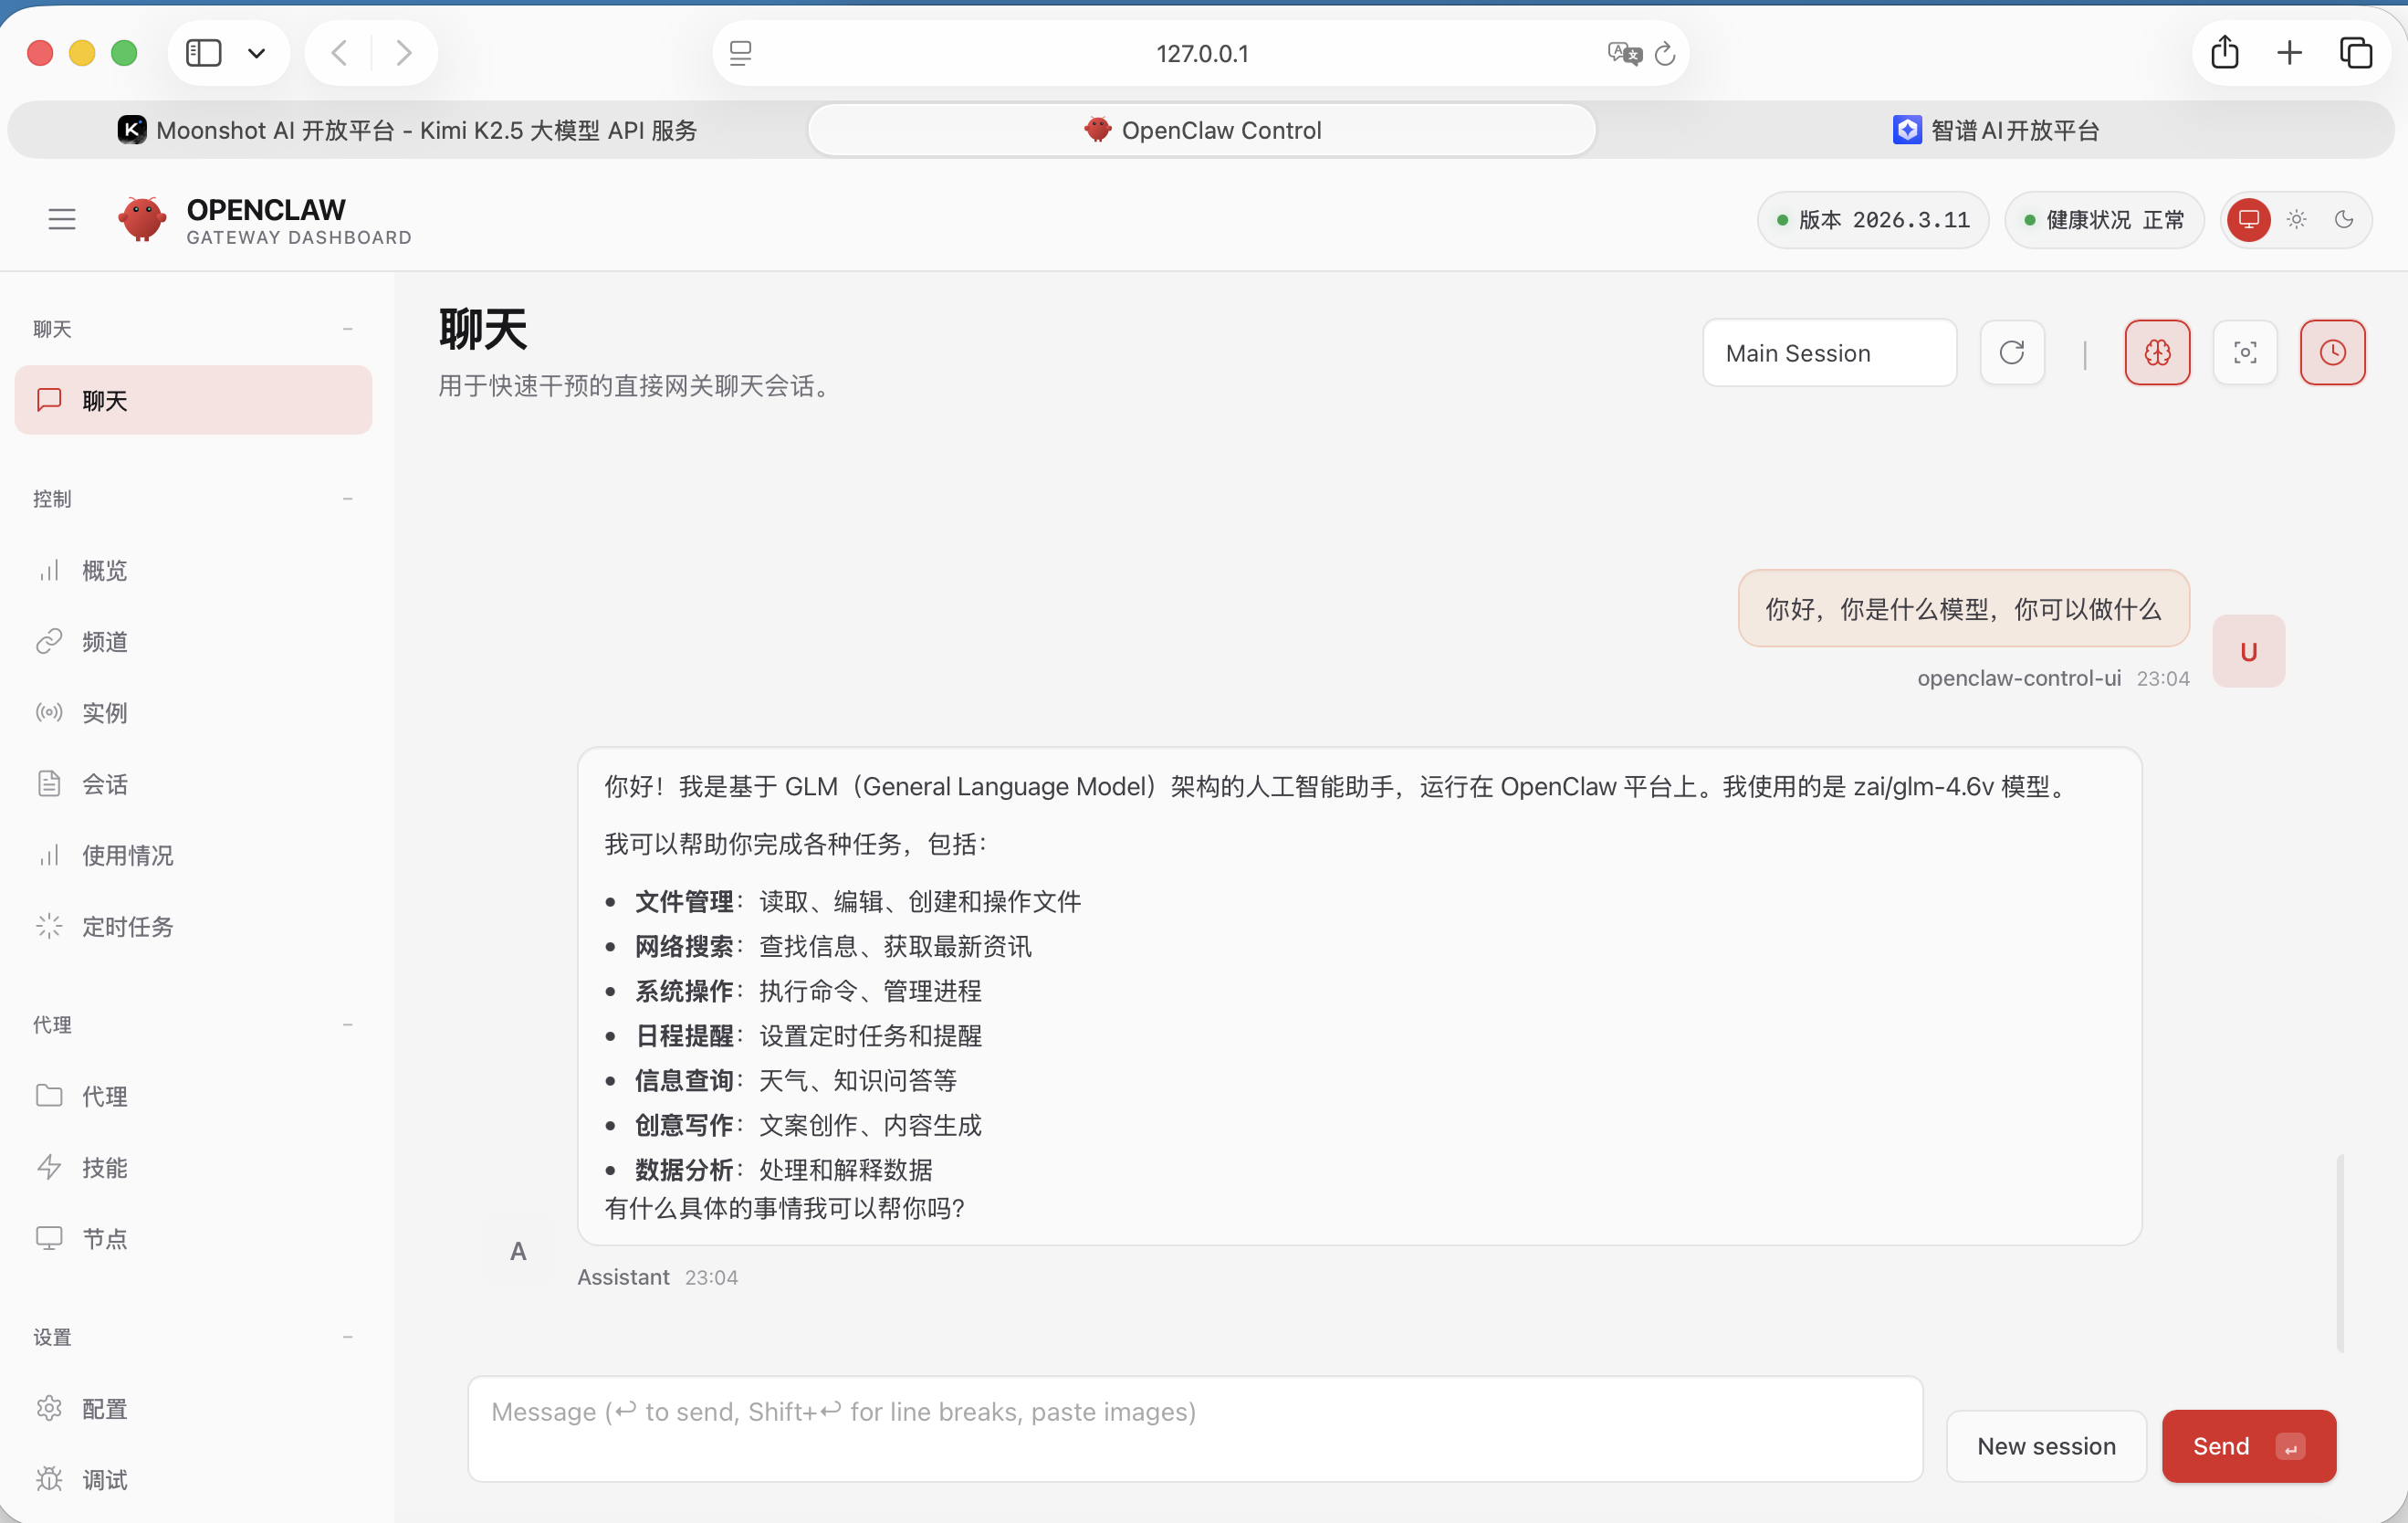
建议选择:Open the Web UI。OpenClaw 初步配置过程已完成,打开网页就可以开始和模型聊天。